When working on web automation with Selenium, I encountered scenarios where I needed to refresh pages from time to time. When does this happen? One scenario is that I needed to refresh the page to check that the data I expected to see was still available even after refreshing. Another possibility is to clear form data without going through each input individually.
But perhaps the refresh is necessary to avoid the most common Selenium Exceptions like StaleElementReferenceException.
In this blog, we look at how to refresh page using Selenium C#.
What is StaleElementReferenceException in Selenium?
StaleElementReferenceException means that the web element you try to find on the page has become stale.
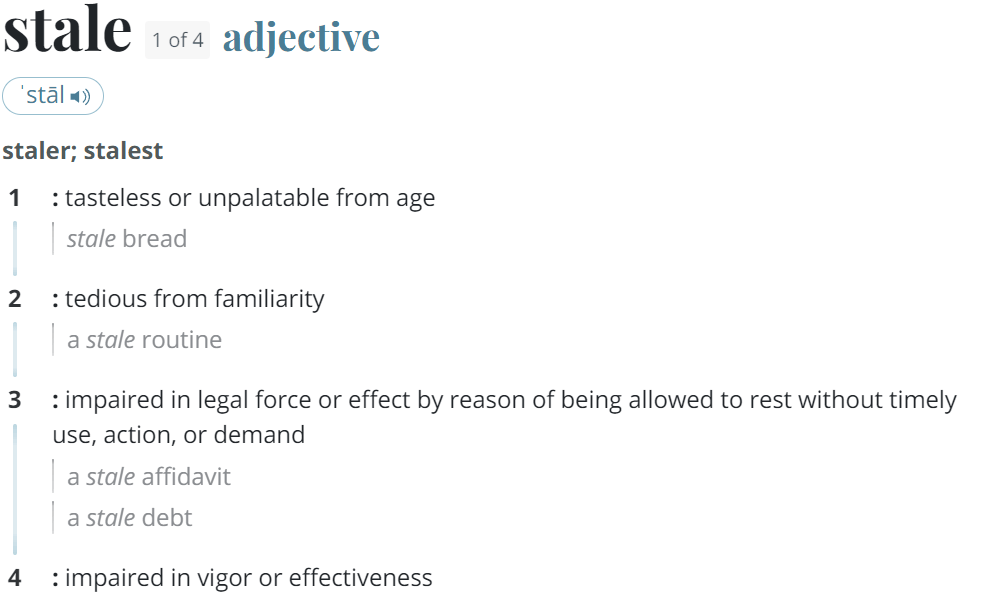
But what does it mean that an element on a web page is stale, and how does it get into that state? The common reasons why this happens are because the element has been deleted from the page or it is no longer attached to the DOM. An element can be deleted from the DOM because either the user has left the page that the element was on or that page has been reloaded.
It’s different from NoSuchElementException because, for the latter, the element was never found on the page, while with StaleElementreferenceException, the element has been found on the DOM, but the DOM changed.
Consider an example of LambdaTest eCommerce Playground; you locate a product, click on the product name, and open the product page. After validating the product, you go back to the previous page. The product is still there in the list, but the web element used to locate it might become stale. In this case, a refresh will ensure the element is found again, with no exception.
In the next section, we will explore how to refresh page using Selenium C#
Check this out: Regression testing - Complete Guide With Best Practices
How to Refresh Page using Selenium C#?
So, how do you refresh page using Selenium C#?
There are three ways to do this.
Using the Navigate().Refresh() command.
Using the Navigate().GoToUrl() using the current page URL.
Simulating the keypress for the F5 key.
In the next section of this blog on how to refresh page using Selenium C#, let’s see them in action with an example.
Run your C# automation scripts across 3000+ environments. Try LambdaTest Now!
Check this out: What is Regression testing — Complete Guide With Best Practices
Demo Example: Refresh Page using Selenium C
Let’s demonstrate how to refresh page using Selenium C#. I’ll use the same scenario, and demonstrate all three ways mentioned above, one by one.
Basically, the test will look the same, except for the line of code that performs the actual refresh of the page. At the time of writing this blog, I’m using C# latest version — 4.6.0, NUnit as a testing framework, the Page Object Model design pattern, and the LambdaTest cloud-based grid for Selenium automation testing.
Continuous quality clouds like LambdaTest let you perform manual and automation testing of your websites and mobile apps on an online device farm of 3000+ real browsers, devices, and operating system combinations. Its cloud-based C# automation testing platform lets you run automation tests using different testing frameworks like Selenium, Playwright, Cypress, and more. With parallel testing, you can further cut down your test execution times by multiple folds.

Subscribe to LambdaTest YouTube Channel and stay updated with detailed tutorials around Selenium testing, Cypress testing, and more.
POM is a design pattern used in automated UI testing, where web page controls are created in separate repositories called page objects. The page objects contain the web elements on their page, together with the methods that are applied to these elements. The test scripts then interact with the elements through these page objects.
The main reason to use POM is that it makes the tests more readable, and it also promotes code reusability and easier maintenance.
Check this out: Regression test — Complete Guide With Best Practices
Test Scenario
Following is the test scenario used to refresh page using Selenium C#.
Navigate to the LambdaTest Selenium Playground.
Click on the first Simple Form Demo link under the Input Forms card.
Go back to the first page.
Click on the Radio Buttons Demo link under the Input Forms card.
I’ll refresh the page between steps 3 and 4 to ensure that none of the links become stale.
Prerequisites
To get started, let’s look at the prerequisites for a new project.
- The NUnit framework. When creating a new project, you need to select the NUnit project type in Visual Studio.
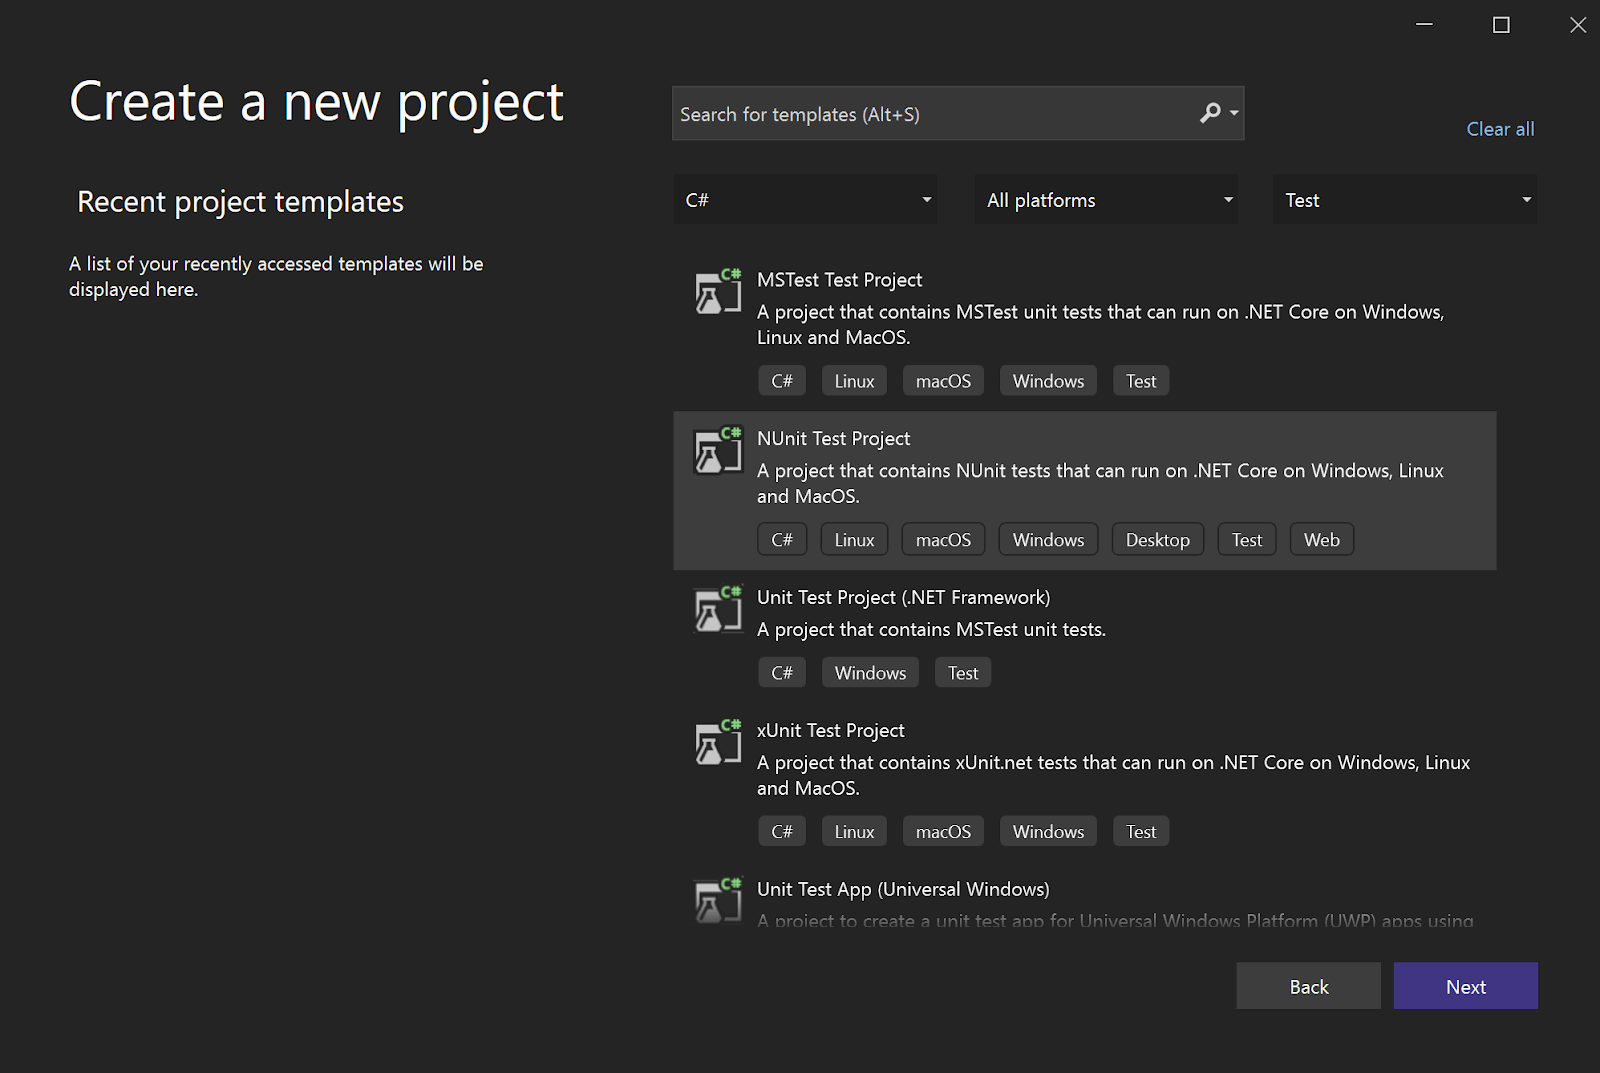
- Add a name for the project, complete the next step, and create a brand-new test project.
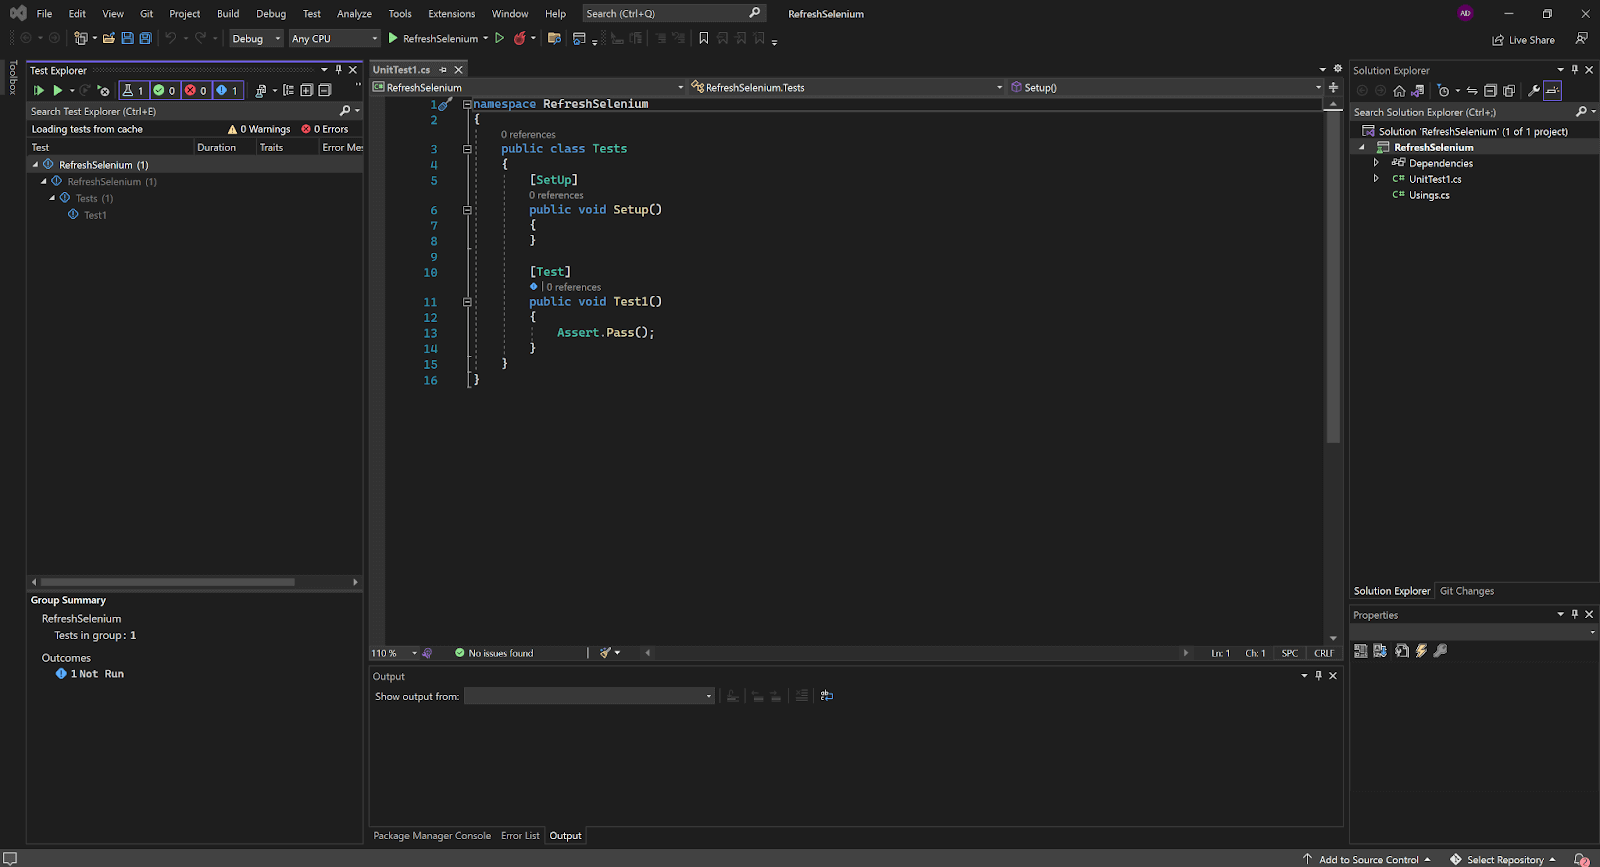
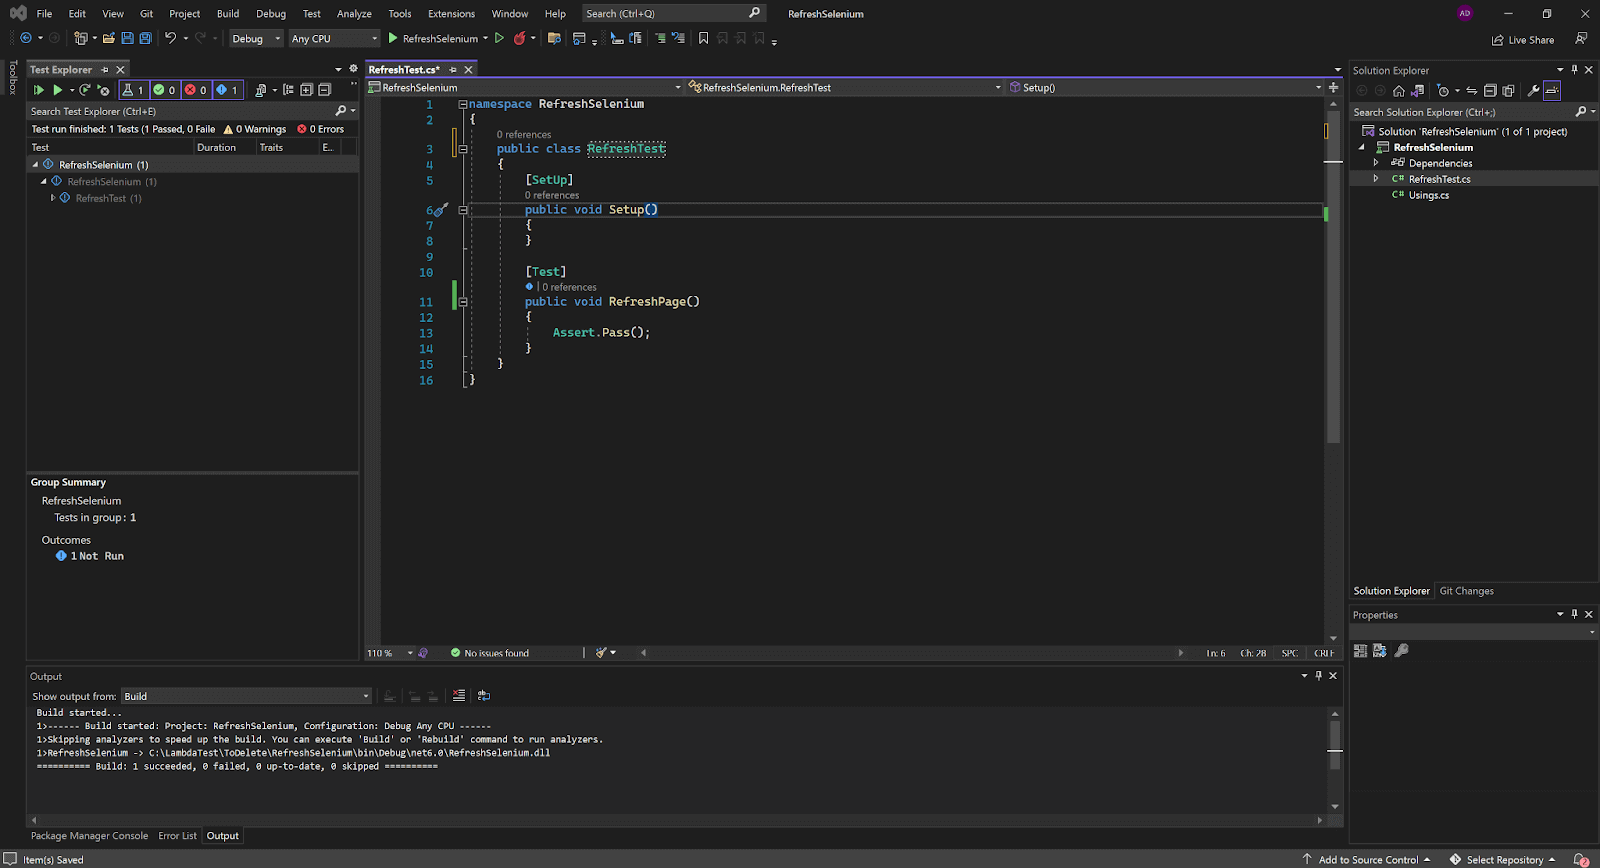
The [SetUp] and [Test] are NUnit annotations, which mark the methods following them. The SetUp method will run before each test, and the method marked as Test will be recognized as a test method.
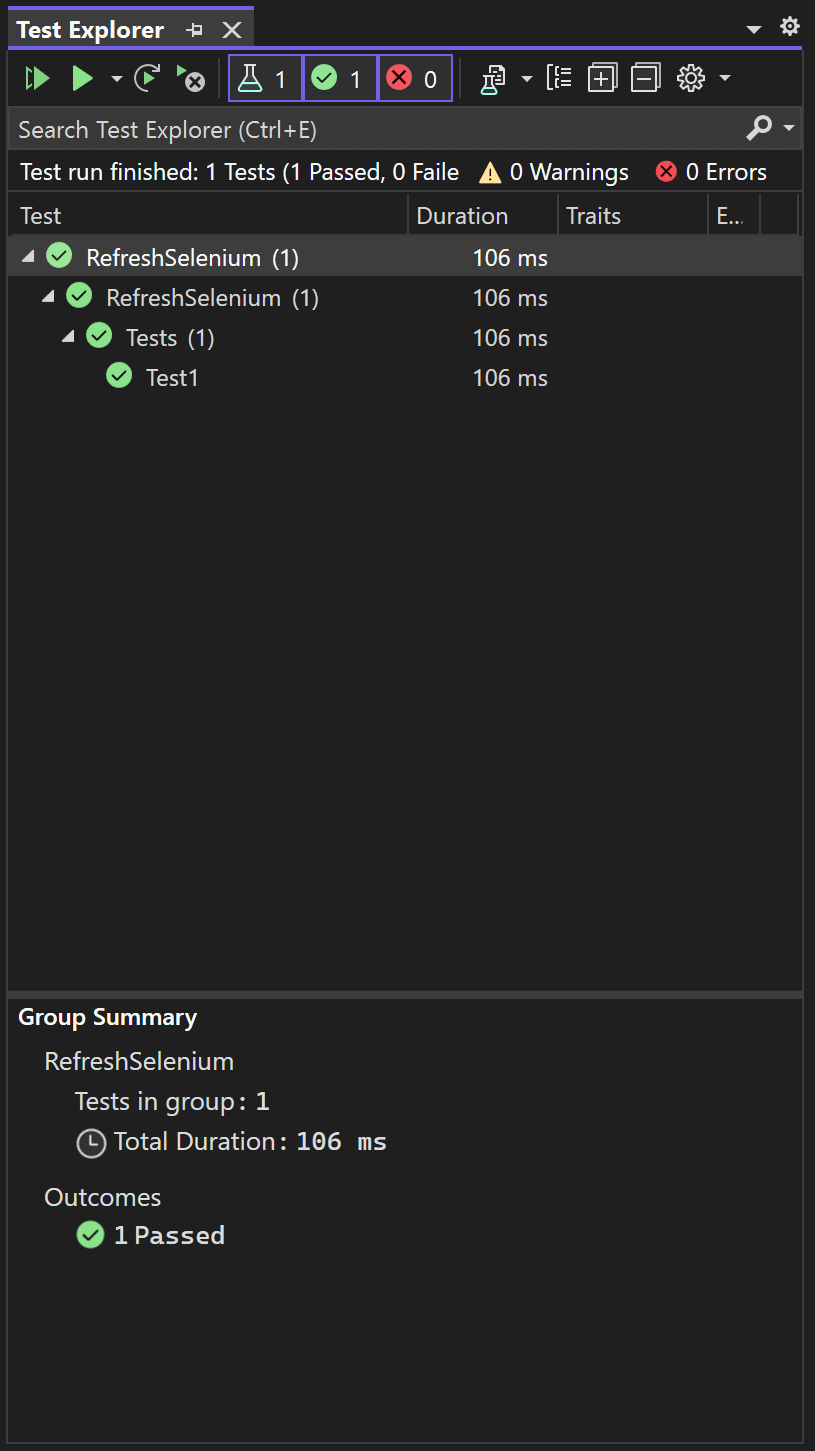
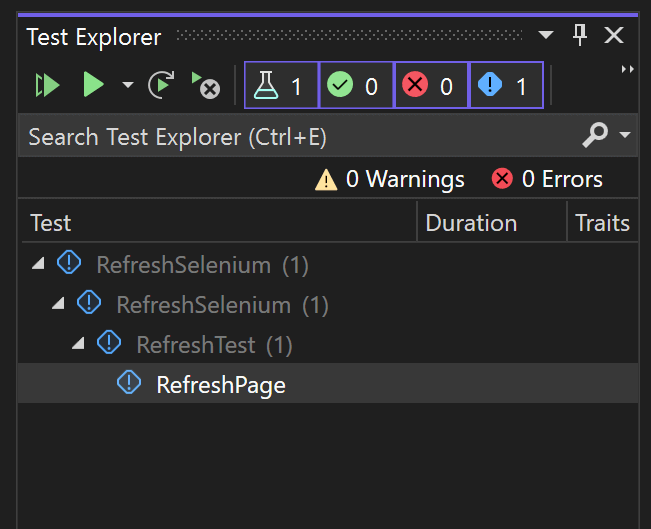
If you have the Test Explorer open (if not, you can open it from View → Test Explorer), you will see the test displayed.
Assert is an NUnit class that allows us to make test validations. The current code will make our test pass every time because no real validation is added there.
3- You can start the tests from the Test Explorer pane.
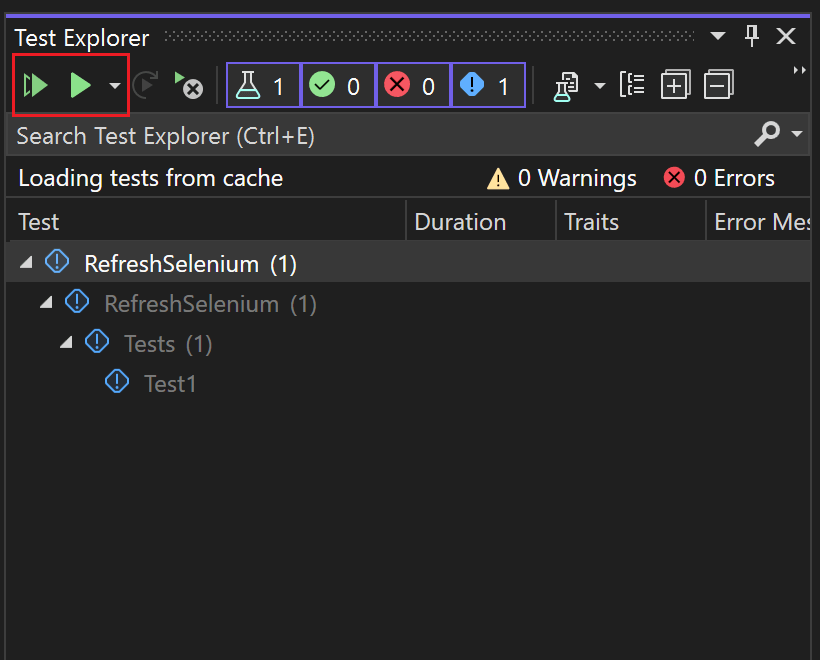
4- Once the test is executed, it will be updated with the result.
The class and test method can be renamed to reflect what is being tested. I renamed them RefreshTest (the class) and RefreshPage (the test).
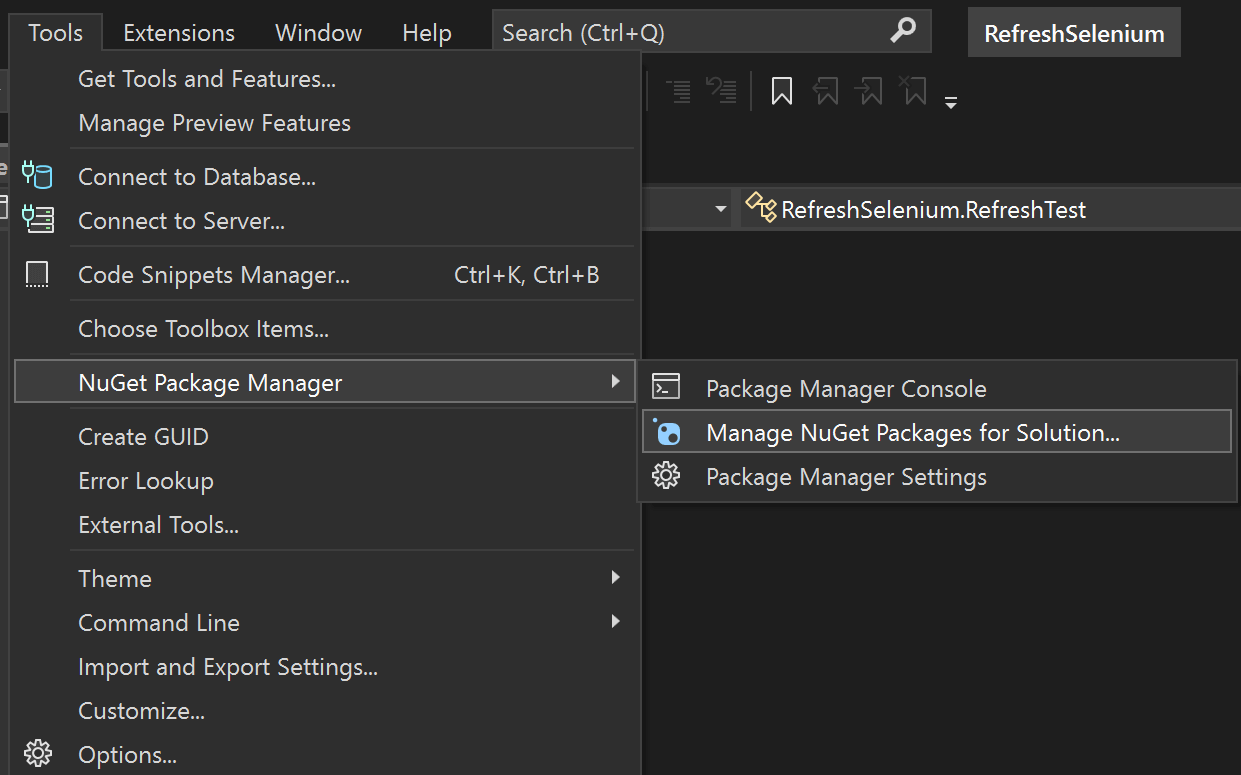
5- You’ll need to add the NuGet packages you’ll use in this project. You can add them from the user interface, from the Tools → NuGet Package Manager.
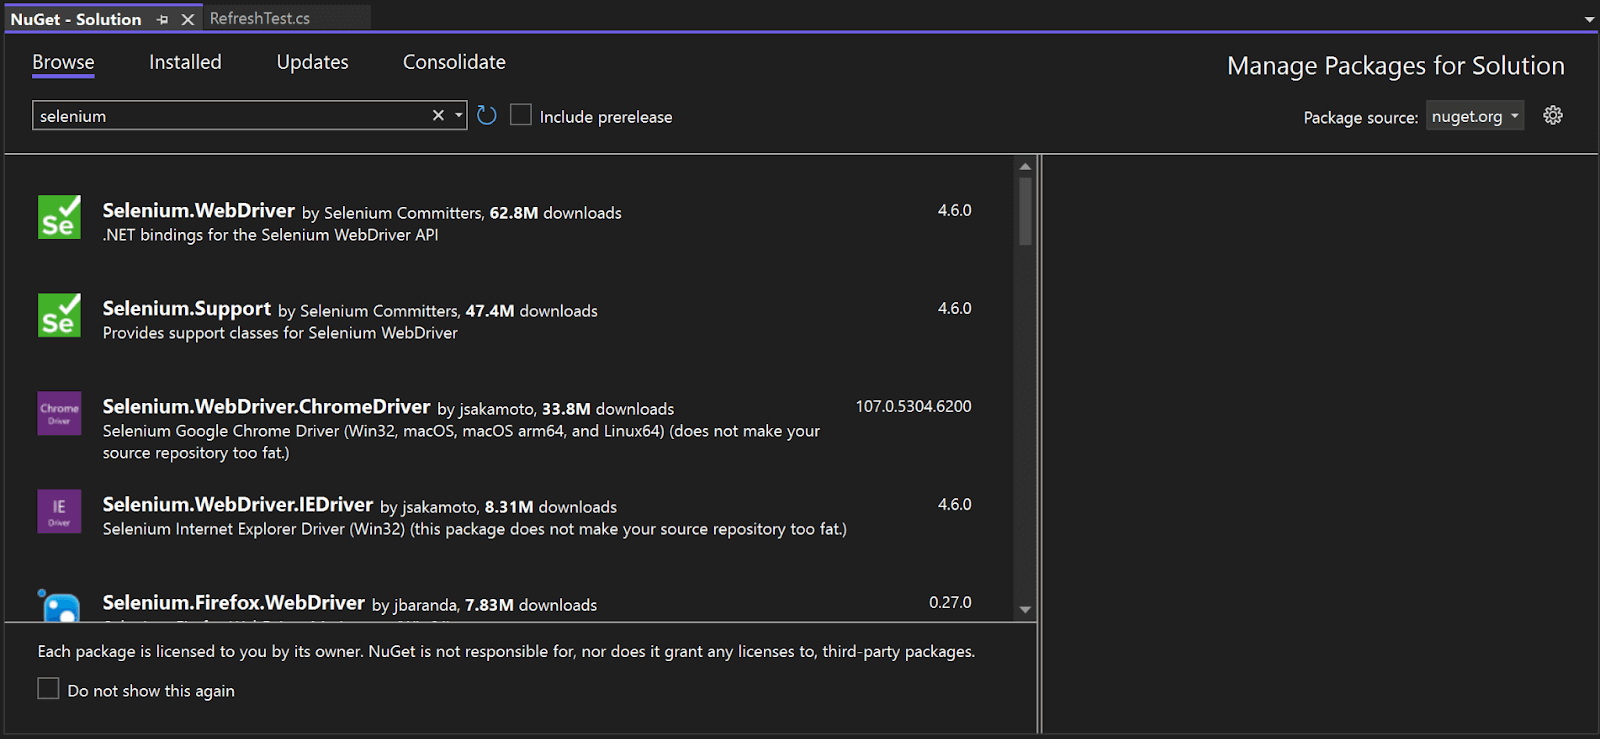
6- Go to the Browser tab and search for the needed packages.
Another way to install the required packages is by navigating to Tools → NuGet Package Manager and running the below command.
PM> NuGet\Install-Package Selenium.WebDriver -Version 4.6.0

As I’ll be using LambdaTest for the browser, I only need the Selenium.WebDriver package. To use the LambdaTest Selenium grid, you will need to define the capabilities using LambdaTest Capabilities Generator.
Here are the ones I use to test on Safari 15 and capture screenshots on every command.
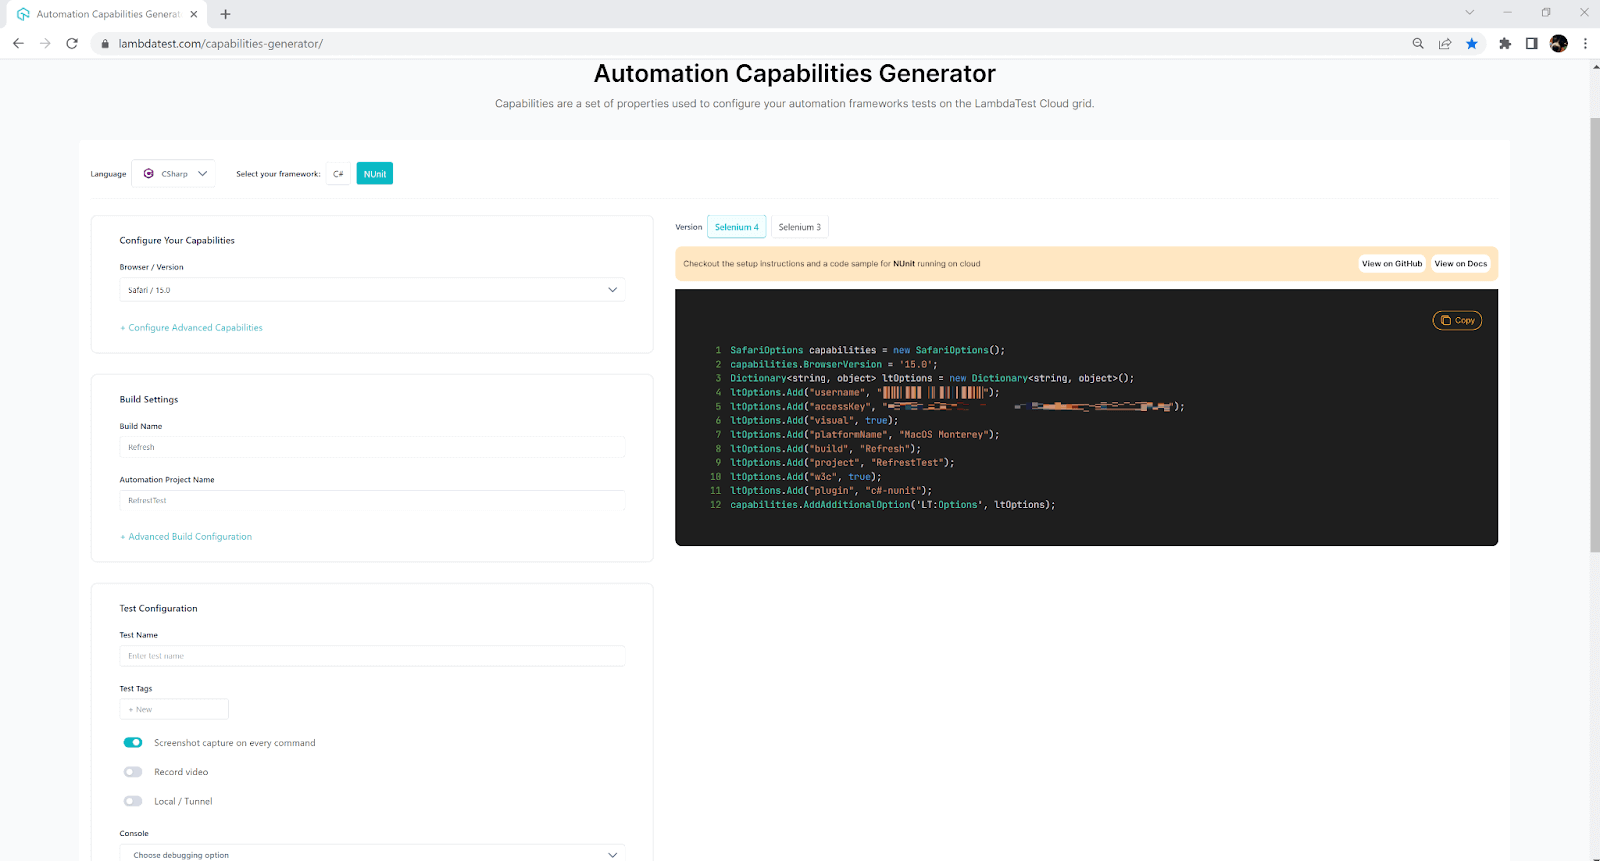
If you want to run the tests locally on the machine, you can skip this part and add the driver for the browser you want to use. Add another class to the project, call it something like PlaygroundHomePage.cs and let’s see what each class will contain.
Check this out: Online Automated Testing Platform - Accelerate your release velocity with blazing fast test automation on cloud
Implementation
In this blog section on how to refresh page using Selenium C#, we focus on the code implementation. Below is the test code for the PlaygroundHomePage.cs page object class.
  using OpenQA.Selenium;
    using System;
    using System.Collections.Generic;
    using System.Linq;
    using System.Text;
    using System.Threading.Tasks;

    namespace RefreshSelenium
    {
        internal class PlaygroundHomePage
        {
            private IWebDriver driver;
            public PlaygroundHomePage(IWebDriver driver)
            {
                this.driver = driver;
            }

            public IWebElement SimpleFormLink => driver.FindElement(By.LinkText("Simple Form Demo"));
            public IWebElement RadioButtonsLink => driver.FindElement(By.LinkText("Radio Buttons Demo"));

            internal void NavigateToLink(IWebElement pageLink)
            {
                pageLink.Click();
            }
        }
    }
Test script for Refresh.cs
   using OpenQA.Selenium;
    using OpenQA.Selenium.Remote;
    using OpenQA.Selenium.Safari;

    namespace RefreshSelenium
    {
        public class RefreshTest
        {

            private static IWebDriver driver;
            private static readonly string gridURL = "@hub.lambdatest.com/wd/hub";
            private static readonly string LT_USERNAME = Environment.GetEnvironmentVariable("LT_USERNAME");
            private static readonly string LT_ACCESS_KEY = Environment.GetEnvironmentVariable("LT_ACCESS_KEY");

            [SetUp]
            public void Setup()
            {
                SafariOptions capabilities = new SafariOptions();
                capabilities.BrowserVersion = "15.0";
                Dictionary<string, object> ltOptions = new Dictionary<string, object>();
                ltOptions.Add("username", LT_USERNAME);
                ltOptions.Add("accessKey", LT_ACCESS_KEY);
                ltOptions.Add("visual", true);
                ltOptions.Add("platformName", "MacOS Monterey");
                ltOptions.Add("build", "Refresh");
                ltOptions.Add("project", "RefrestTest");
                ltOptions.Add("w3c", true);
                ltOptions.Add("plugin", "c#-nunit");
                capabilities.AddAdditionalOption("LT:Options", ltOptions);
                driver = new RemoteWebDriver(new Uri($"https://{LT_USERNAME}:{LT_ACCESS_KEY}{gridURL}"), capabilities);
            }

            [Test]
            public void RefreshPage()
            {
                PlaygroundHomePage homePage = new PlaygroundHomePage(driver);
                driver.Navigate().GoToUrl("https://www.lambdatest.com/selenium-playground/");
                homePage.NavigateToLink(homePage.SimpleFormLink);
                driver.Navigate().Back();
                driver.Navigate().Refresh();
                homePage.NavigateToLink(homePage.RadioButtonsLink);
            }

            [TearDown]
            public void TearDown()
            {
                driver.Quit();
            }
        }
    }
Code Explanation
This blog section on how to refresh page using Selenium C# deals with the explanation of our test codes.
- PlaygroundHomePage.cs: This class stores the elements that I’ll be interacting with. Since the test is short, I only use two links on the page, but the class can be as big as needed if it needs to contain more elements or actions on the elements.
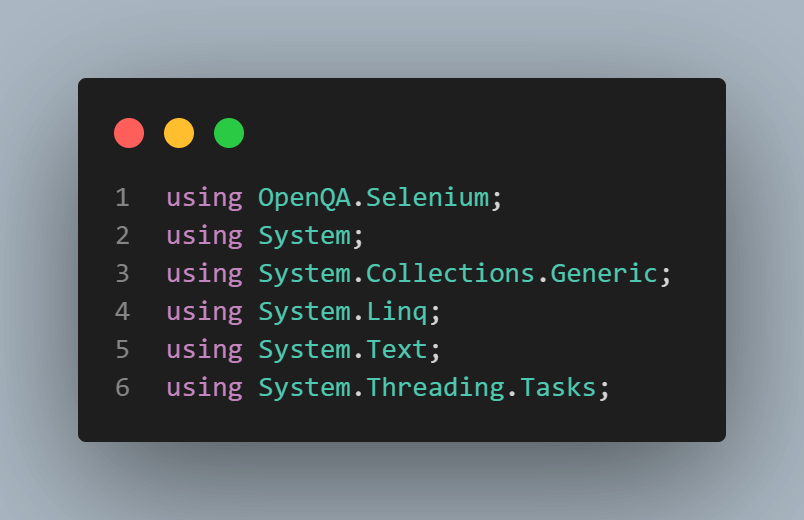
The first part of any C# class is the one where we define all namespaces we need inside the class. Next, we have the variables and constructors we need in the page object.
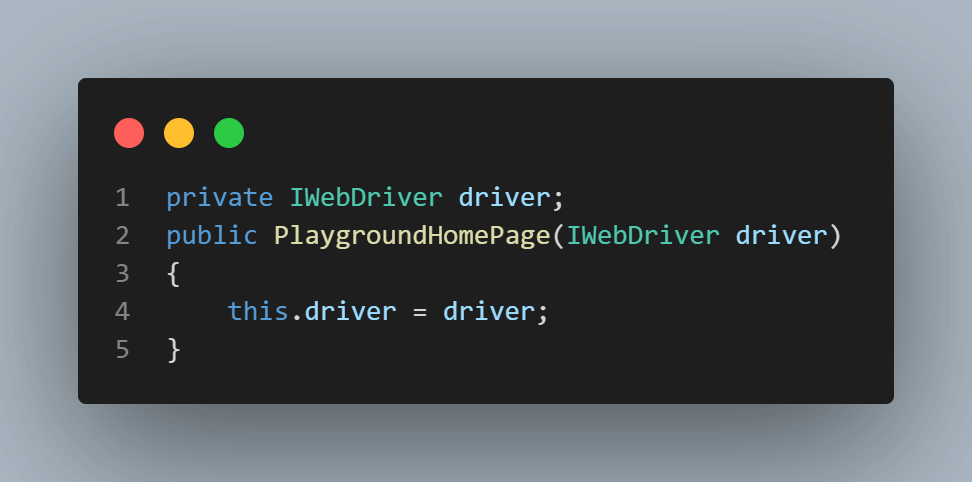
We need to create a new instance of the Selenium WebDriver that will be used later.
Here, I have the elements I will interact with.

I’ll only be working on links now, so I used one of the Locators in Selenium — LinkText. If you are using other elements, you might want to consider different strategies, such as Id, TagName, or even XPath and CSS Selectors.
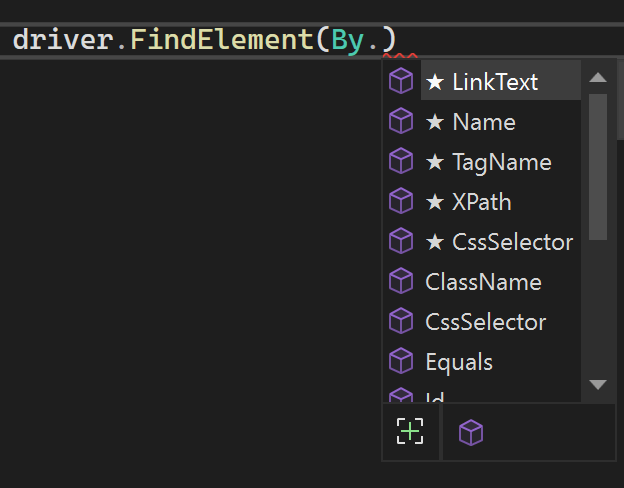
In this case, using the Developer Tools to create complicated XPath or CSS Selectors wouldn’t make sense when I can use the visible link text. As a result, I added one method that could be reused on all links.
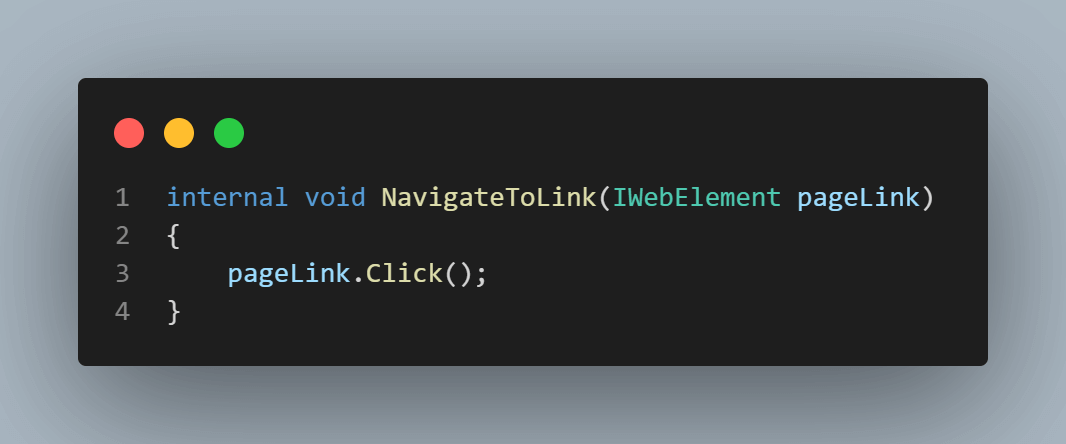
I’m passing an IWebElement parameter and using the Selenium .Click() command to click it. Alternatively, as shown below, I could use a different method for each link I want to click.
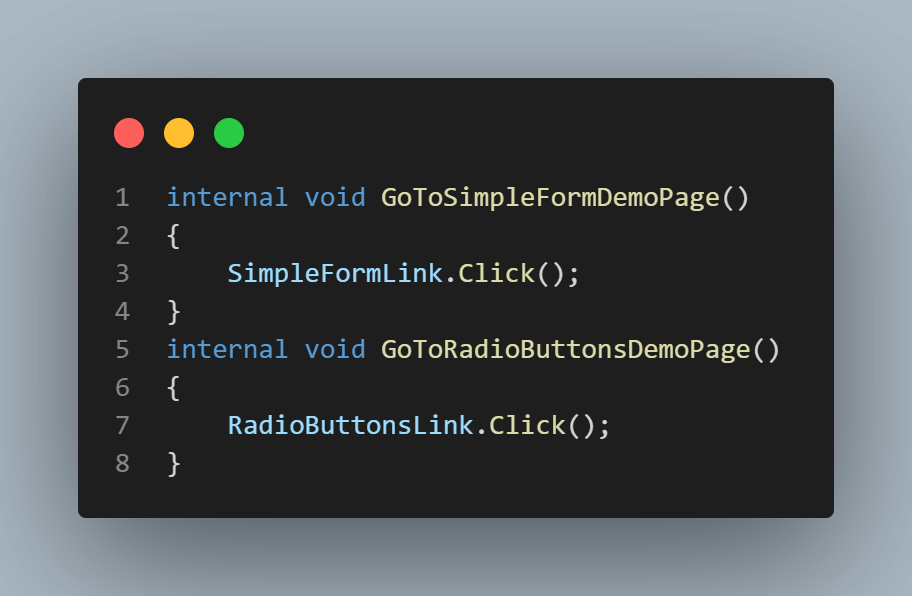
That’s it on my page object. You can expect normal page object classes to be larger and have more complex functions — this one is just a demo.
- Refresh.cs: Just like the page object class, it begins with the using statements.
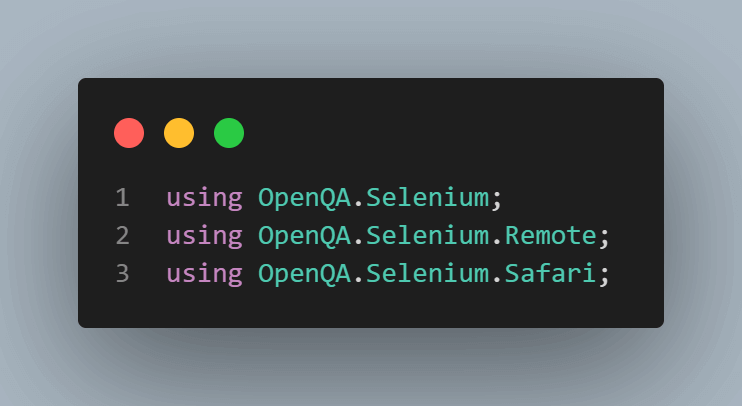
Inside the class, I need to declare the variables to use.

The driver variable is the one I use to interact with the browser. The following three variables: gridURL, LT_USERNAME, and LT_ACCESS_KEY, are related to my LambdaTest account.
In the meantime, I have them saved as environment variables, and my code reads them from there.
[SetUp] method: In the below test script, all the lines except the last one are directly copied from the LambdaTest Automation Capabilities Generator I mentioned above. The configuration I want to use: is Safari 15.0. But you can choose whatever suits your needs.
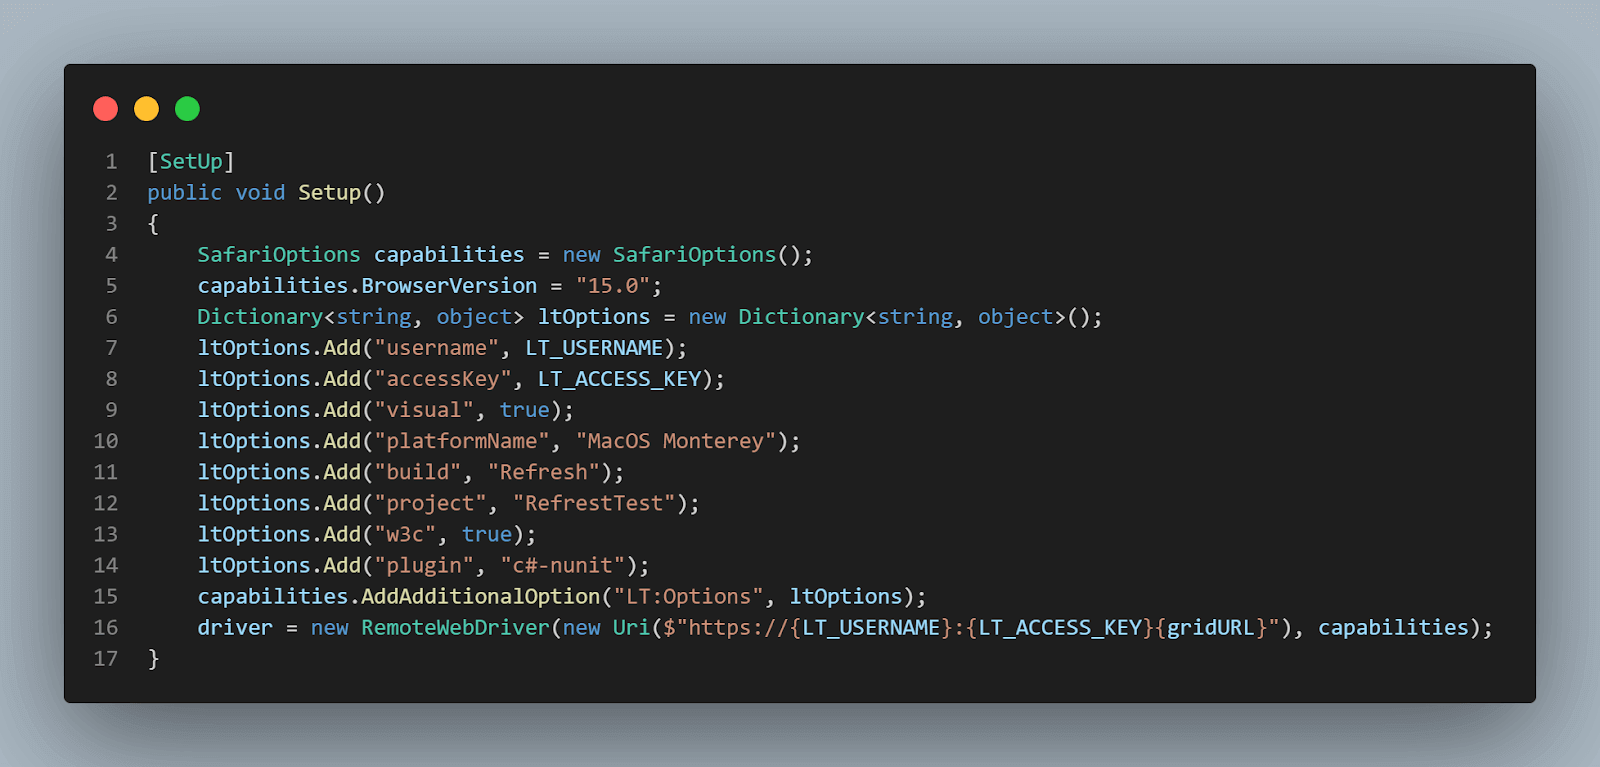
The last line creates a new RemoteWebDriver using my LambdaTest credentials. If you want to run the tests locally, you can add a NuGet package of the desired driver, such as Selenium.WebDriver.ChromeDriver, and update the setup to use a new ChromeDriver instance like this.
    private static IWebDriver driver;

    [SetUp]
    public void Setup()
    {
            driver = new ChromeDriver();
    }
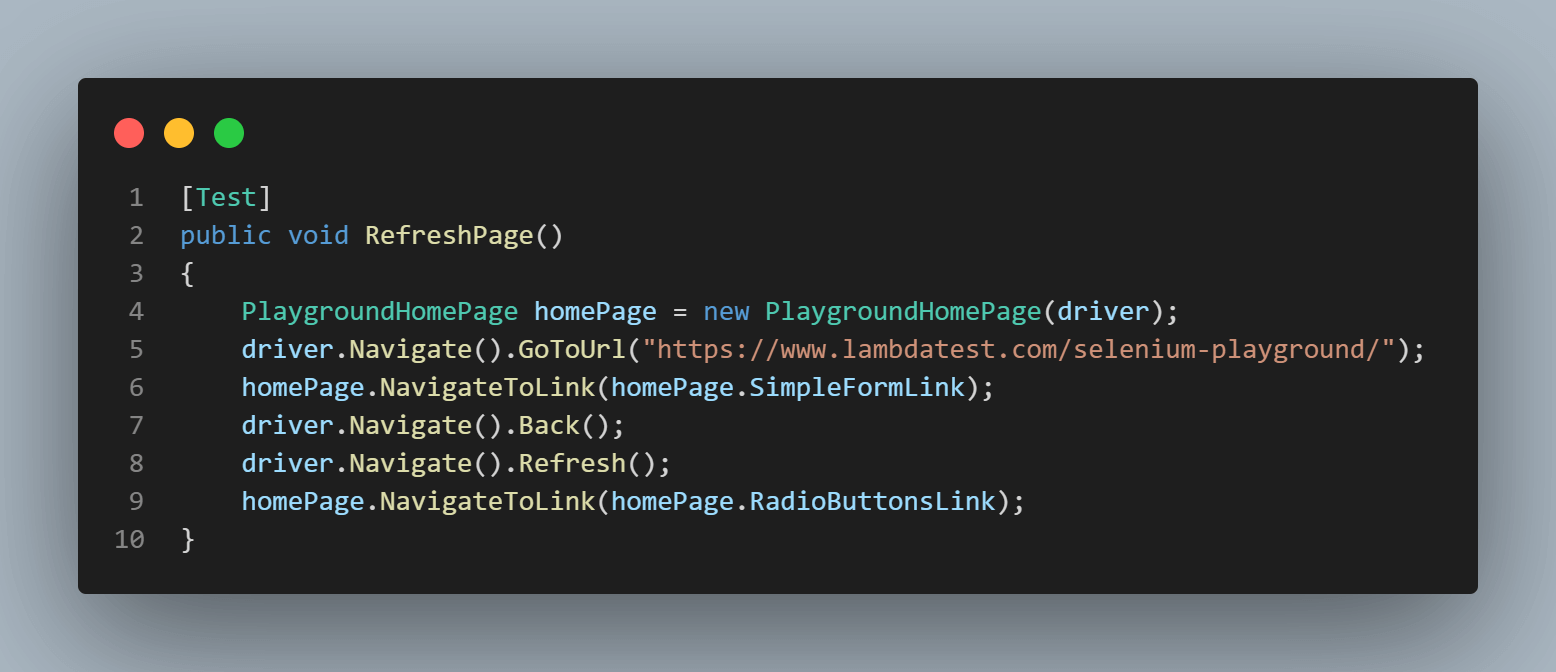
[Test] method: In the first line of code, I created a new instance of the PlaygroundHomePage object. Next, I used the Navigate***().GoToUrl()*** method to open my desired page.
But before we proceed, let’s briefly discuss the Navigate method in Selenium. The Navigate() method returns an INavigation interface on which we can perform several actions.
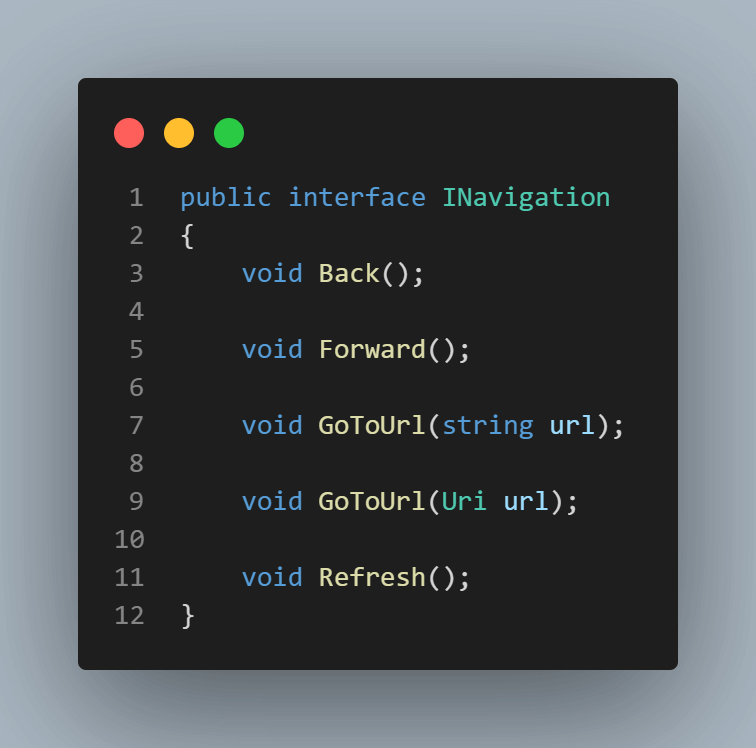
We have GoToUrl***()***, which everybody uses to navigate a specific web page. You are probably already familiar with it, if not before, then from the lines of code we just discussed.
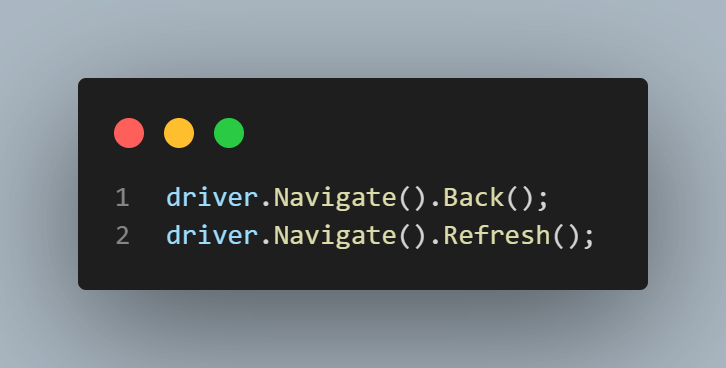
Then, we have the browser actions: Back(), Forward(), and Refresh(). They are all rather self-explanatory. What they basically do is simulate the respective button press in the browser.
Moving on with the code, after opening the web page, I called the generic method that navigates between links, and I passed it the desired element as a parameter:

The next part is where Navigate() comes into play again — I went back to the home page (to continue to verify the links), then I refreshed the page, to make sure that every element is loaded and none of them are stale.
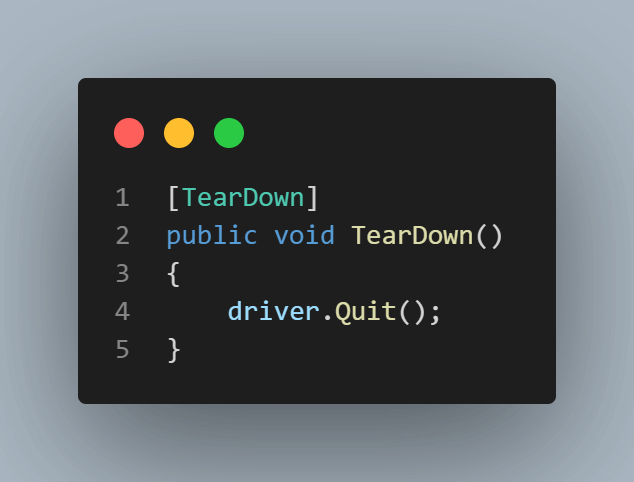
And the last line of code is navigating again on one of the links, passing a different parameter. I also added a TearDown method — to close the browser window after my test is done, using the [TearDown] NUnit annotation, which marks a method that will run after each test execution.
Test Execution
Now that everything is clear, you can start the execution from Visual Studio’s Test Explorer the same way as before.
I’m running my tests on the LambdaTest cloud Selenium Grid. So once the test passes, you can only see the test result on the LambdaTest Automation Dashboard. But if you run it locally, you will see the browser window open up and all the steps performed.
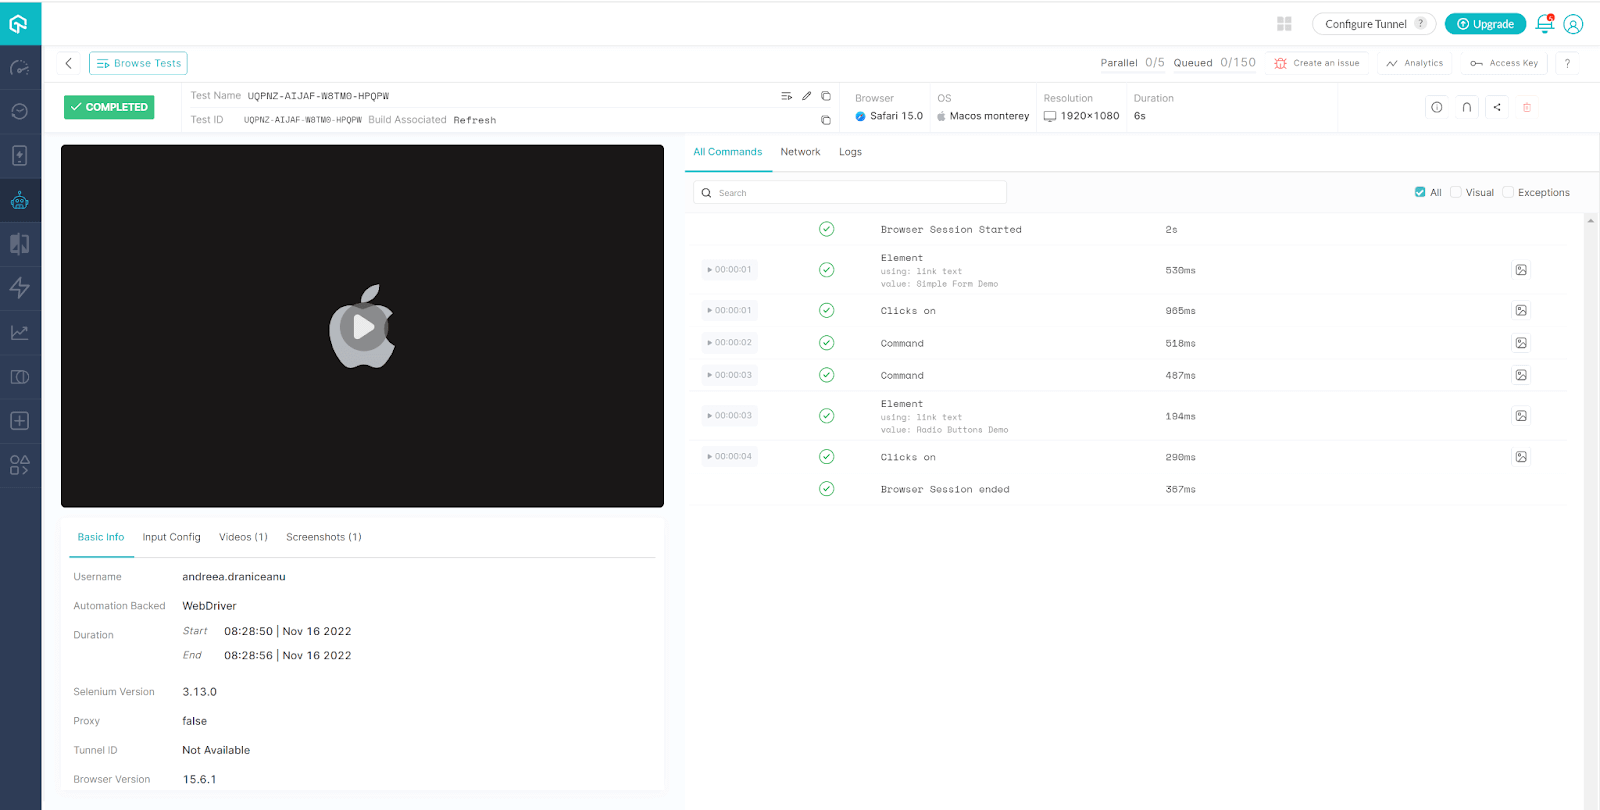
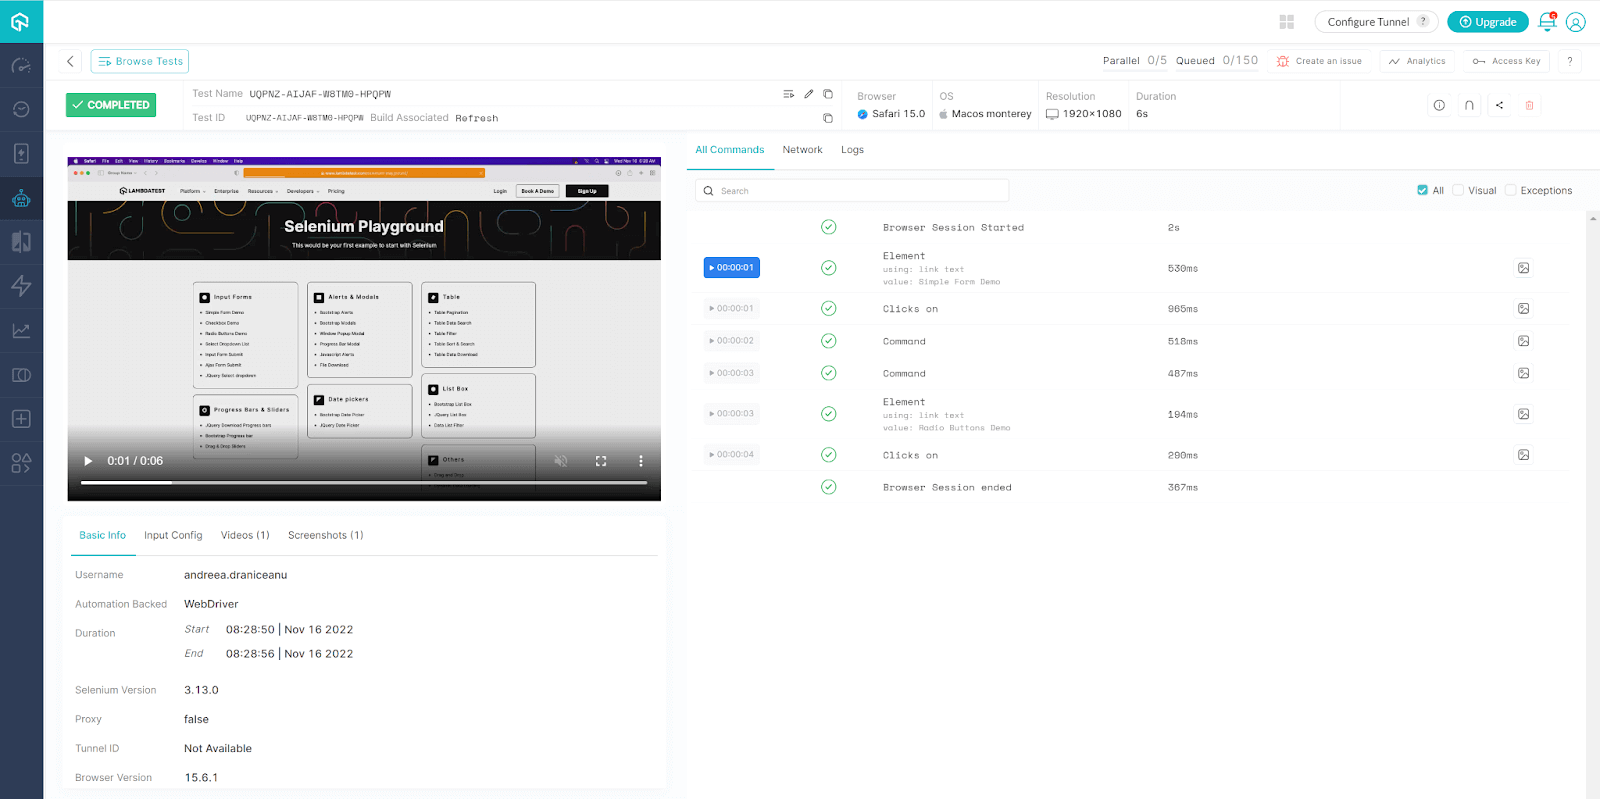
On the left, you can see a video recording of the test, and on the right, configuration information (the capabilities I added in the setup) and details on each step. You can also reply to the video from a selected step.
I also added the screenshot capability so that each step will have a corresponding screenshot.
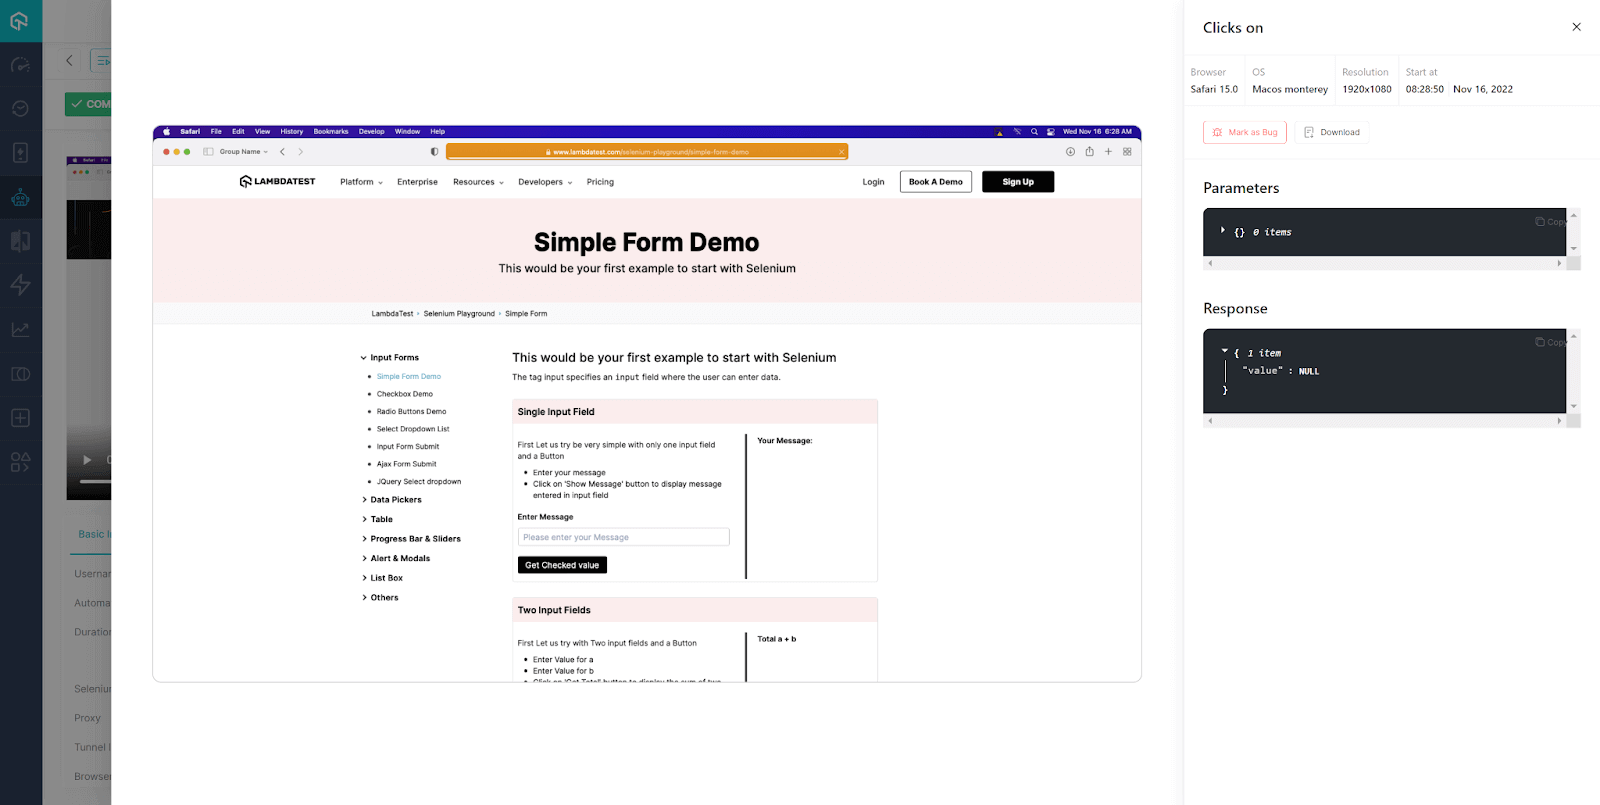
This is especially useful if any steps fail and a bug is found. This way, I have all the information I need to report the bug.
Refresh the Page with SendKeys()
In this blog section on how to refresh page using Selenium C#, let’s look at another way of refreshing the page. This time we’ll use the SendKeys() command in Selenium SendKeys. The page object class stays the same, and the test code will look like this.
   using OpenQA.Selenium;
    using OpenQA.Selenium.Remote;
    using OpenQA.Selenium.Safari;

    namespace RefreshSelenium
    {
        public class RefreshTest
        {

            private static IWebDriver driver;
            private static readonly string gridURL = "@hub.lambdatest.com/wd/hub";
            private static readonly string LT_USERNAME = Environment.GetEnvironmentVariable("LT_USERNAME");
            private static readonly string LT_ACCESS_KEY = Environment.GetEnvironmentVariable("LT_ACCESS_KEY");

            [SetUp]
            public void Setup()
            {
                SafariOptions capabilities = new SafariOptions();
                capabilities.BrowserVersion = "15.0";
                Dictionary<string, object> ltOptions = new Dictionary<string, object>();
                ltOptions.Add("username", LT_USERNAME);
                ltOptions.Add("accessKey", LT_ACCESS_KEY);
                ltOptions.Add("visual", true);
                ltOptions.Add("platformName", "MacOS Monterey");
                ltOptions.Add("build", "Refresh");
                ltOptions.Add("project", "RefrestTest");
                ltOptions.Add("w3c", true);
                ltOptions.Add("plugin", "c#-nunit");
                capabilities.AddAdditionalOption("LT:Options", ltOptions);
                driver = new RemoteWebDriver(new Uri($"https://{LT_USERNAME}:{LT_ACCESS_KEY}{gridURL}"), capabilities);
            }

            [Test]
            public void RefreshPage()
            {
                PlaygroundHomePage homePage = new PlaygroundHomePage(driver);
                driver.Navigate().GoToUrl("https://www.lambdatest.com/selenium-playground/");
                homePage.NavigateToLink(homePage.SimpleFormLink);
                driver.Navigate().Back();
                driver.Navigate().Refresh();
                homePage.RadioButtonsLink.SendKeys(Keys.F5);
                homePage.NavigateToLink(homePage.RadioButtonsLink);
            }

            [TearDown]
            public void TearDown()
            {
                driver.Quit();
            }
        }
    }
The only thing that differs in this version is the line of code that refreshes the page.
What we need here is the Selenium SendKeys() command. SendKeys() is a Selenium keyboard action performed on a web element. It’s typically used to enter text inside an element such as an input (think form fields such as username and password, search bars, contact forms, and so on).
In my specific case, I am not trying to add text to use any element on the page. I am using the RadioButtonsLink from the LambdaTest Playground Home page because it’s an element I’m using in my test anyway. I don’t want to add additional code to the page object class.
The test execution is done the same way and will have the same result as before.
Check this out: 30 Top Automated Testing Tools In 2022
Refresh the Page using Navigate().GoToUrl()
Now, there is another way to refresh page using Selenium C#. I will stick to the same scenario while keeping the same setup and tear down. The only thing that changes is the line that refreshes the page.
Let’s refresh page using Selenium C# with Navigate(), but this time using the GoToUrl() command. The class will now look like this.
   using OpenQA.Selenium;
    using OpenQA.Selenium.Remote;
    using OpenQA.Selenium.Safari;

    namespace RefreshSelenium
    {
        public class RefreshTest
        {

            private static IWebDriver driver;
            private static readonly string gridURL = "@hub.lambdatest.com/wd/hub";
            private static readonly string LT_USERNAME = Environment.GetEnvironmentVariable("LT_USERNAME");
            private static readonly string LT_ACCESS_KEY = Environment.GetEnvironmentVariable("LT_ACCESS_KEY");

            [SetUp]
            public void Setup()
            {
                SafariOptions capabilities = new SafariOptions();
                capabilities.BrowserVersion = "15.0";
                Dictionary<string, object> ltOptions = new Dictionary<string, object>();
                ltOptions.Add("username", LT_USERNAME);
                ltOptions.Add("accessKey", LT_ACCESS_KEY);
                ltOptions.Add("visual", true);
                ltOptions.Add("platformName", "MacOS Monterey");
                ltOptions.Add("build", "Refresh");
                ltOptions.Add("project", "RefrestTest");
                ltOptions.Add("w3c", true);
                ltOptions.Add("plugin", "c#-nunit");
                capabilities.AddAdditionalOption("LT:Options", ltOptions);
                driver = new RemoteWebDriver(new Uri($"https://{LT_USERNAME}:{LT_ACCESS_KEY}{gridURL}"), capabilities);
            }

            [Test]
            public void RefreshPage()
            {
                PlaygroundHomePage homePage = new PlaygroundHomePage(driver);
                driver.Navigate().GoToUrl("https://www.lambdatest.com/selenium-playground/");
                homePage.NavigateToLink(homePage.SimpleFormLink);
                driver.Navigate().Back();
                driver.Navigate().GoToUrl(driver.Url);
                homePage.NavigateToLink(homePage.RadioButtonsLink);
            }

            [TearDown]
            public void TearDown()
            {
                driver.Quit();
            }
        }
    }
Once again, the Setup() and the TearDown() remain the same. What happens here differently is that Selenium uses the current page URL to navigate to it instead of giving the exact URL as a parameter. It’s similar to manually pressing the Enter key inside the browser’s address bar. You will get the same result if you run the test with this code.
Master Selenium automation testing with C# with this certification and establish your credibility as a tester.

Check this out: 30 Top Tools for automation testing In 2022
Key Takeaways
This blog shows how to refresh page using Selenium C#, with NUnit as a testing framework, and a demo of the Page Object Model design pattern.
If you went over all the steps, you should now understand what the StaleElementException is and how you can avoid it. You can also use the refresh page for different scenarios, the same ones where you would need to refresh the page if performing the tests in the browser manually.
The refresh can be done in multiple ways; it is up to you to decide which works best.
![How To Refresh Page Using Selenium C# [Complete Tutorial]](https://cdn.hashnode.com/res/hashnode/image/upload/v1675083352324/9f6e9796-2e7d-454e-9524-eb03974ed53b.png?w=1600&h=840&fit=crop&crop=entropy&auto=compress,format&format=webp)